Bulk importing orders
This guide will talk you through the process of importing multiple orders into BladePRO from a .CSV file.
Last updated 4 days ago
Finding the bulk import template
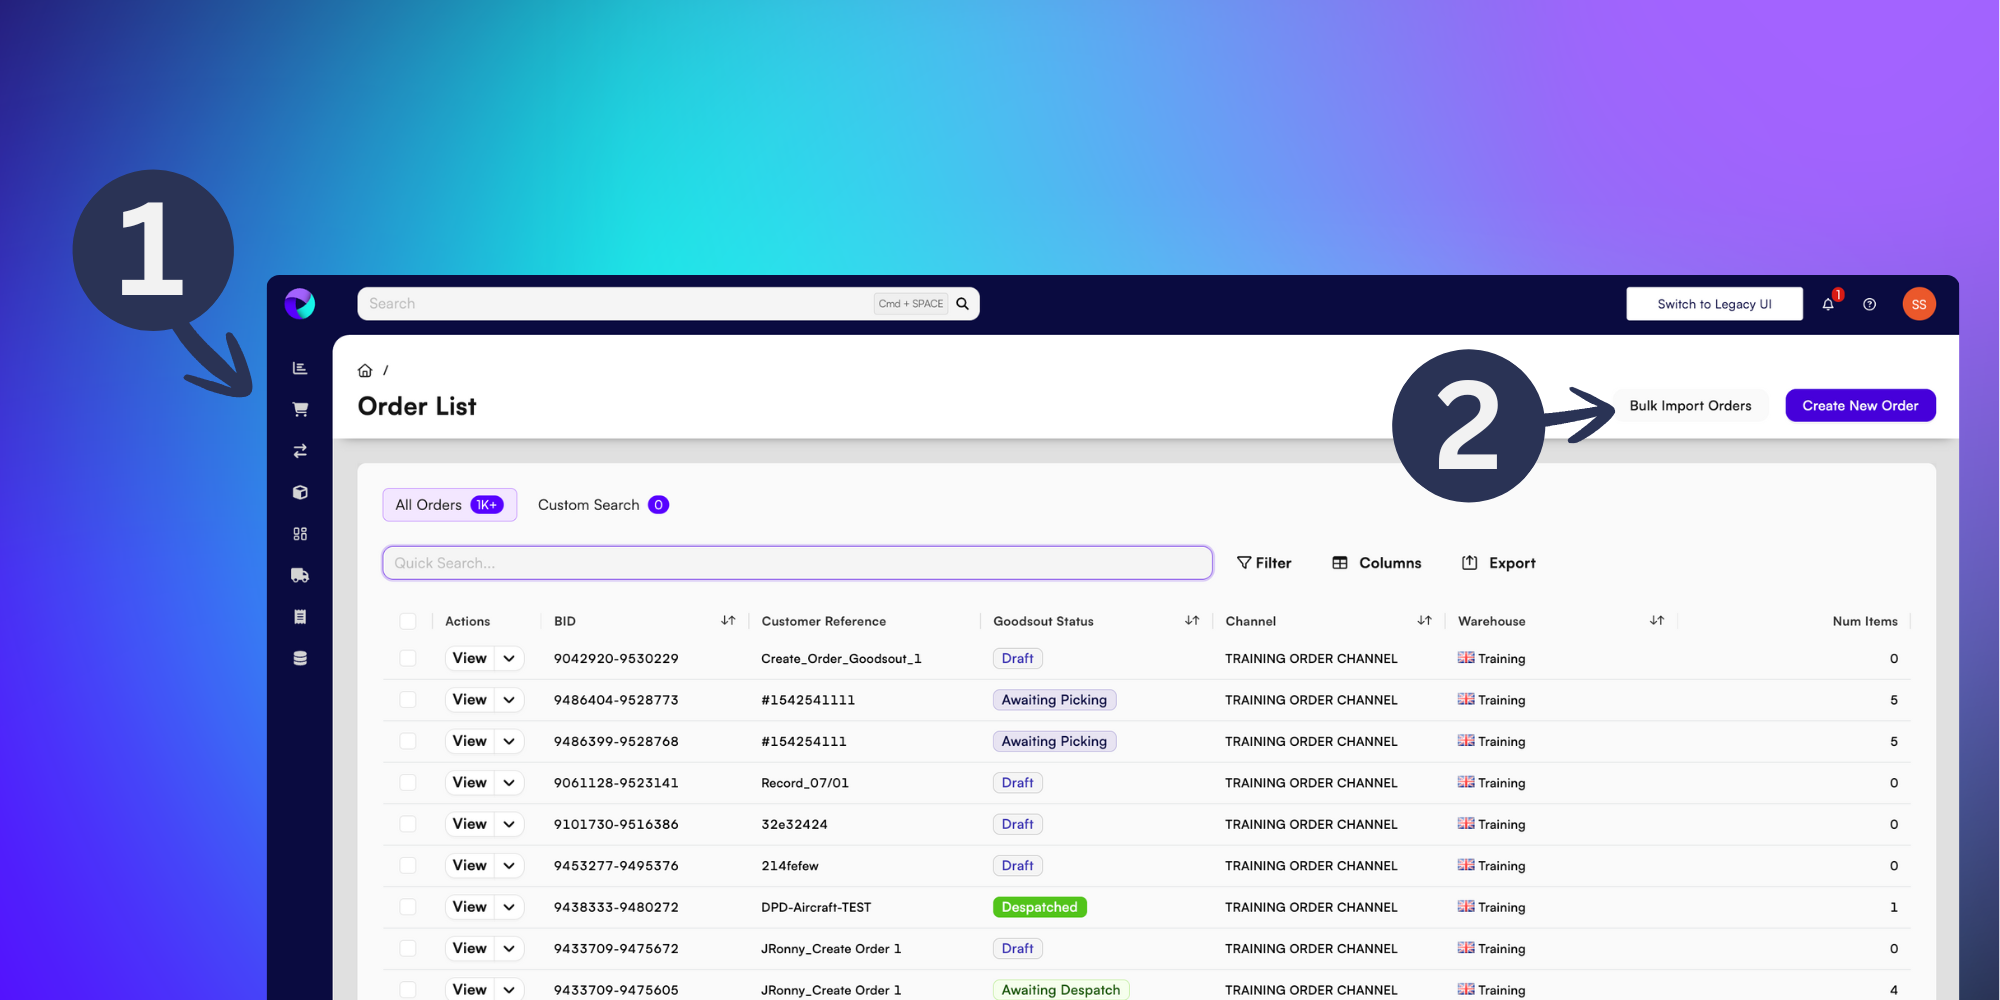
From the Order List page, select Bulk Import Orders in the top right corner (2).
Coming from elsewhere in BladePRO? Find the Order List page by clicking the shopping trolley icon (1) in the left-hand menu.
Next you’ll need to populate the Bulk Import Template.
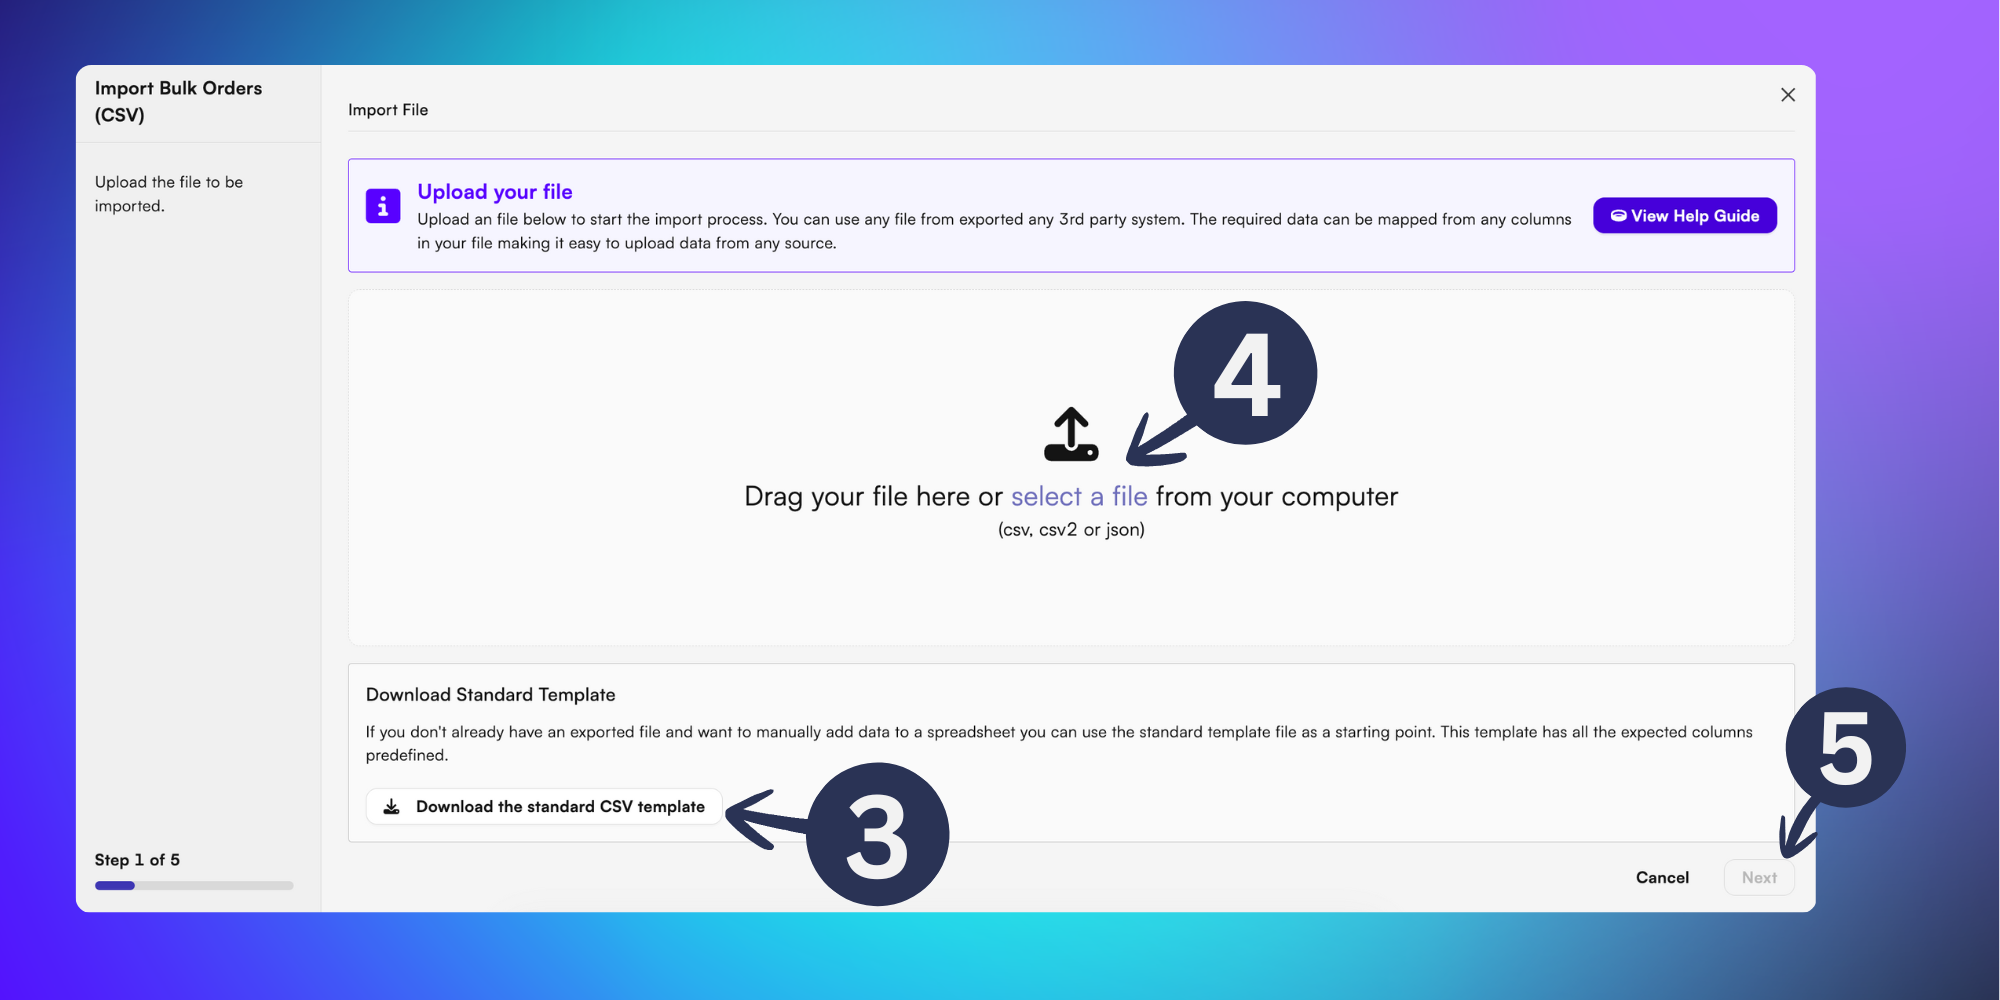
To do this, download it to your device by clicking Download the standard CSV template (3) from the popup and fill in the relevant columns in the spreadsheet.
Populating your bulk import .CSV file
Not every column in the spreadsheet is compulsory but required fields include:
Order reference
Warehouse
First name
Last name
Address line 1
Town
Postcode
County
Country
Email
Phone number
Product
Quantity
Line price
Uploading your .CSV bulk import template
Once you’re happy with your data, save the file to your device and either:
Drag and drop your file into the BladePRO popup
Or, click select a file (4) and locate the file in your finder window
Once uploaded, click Next (5).
Adding basic details
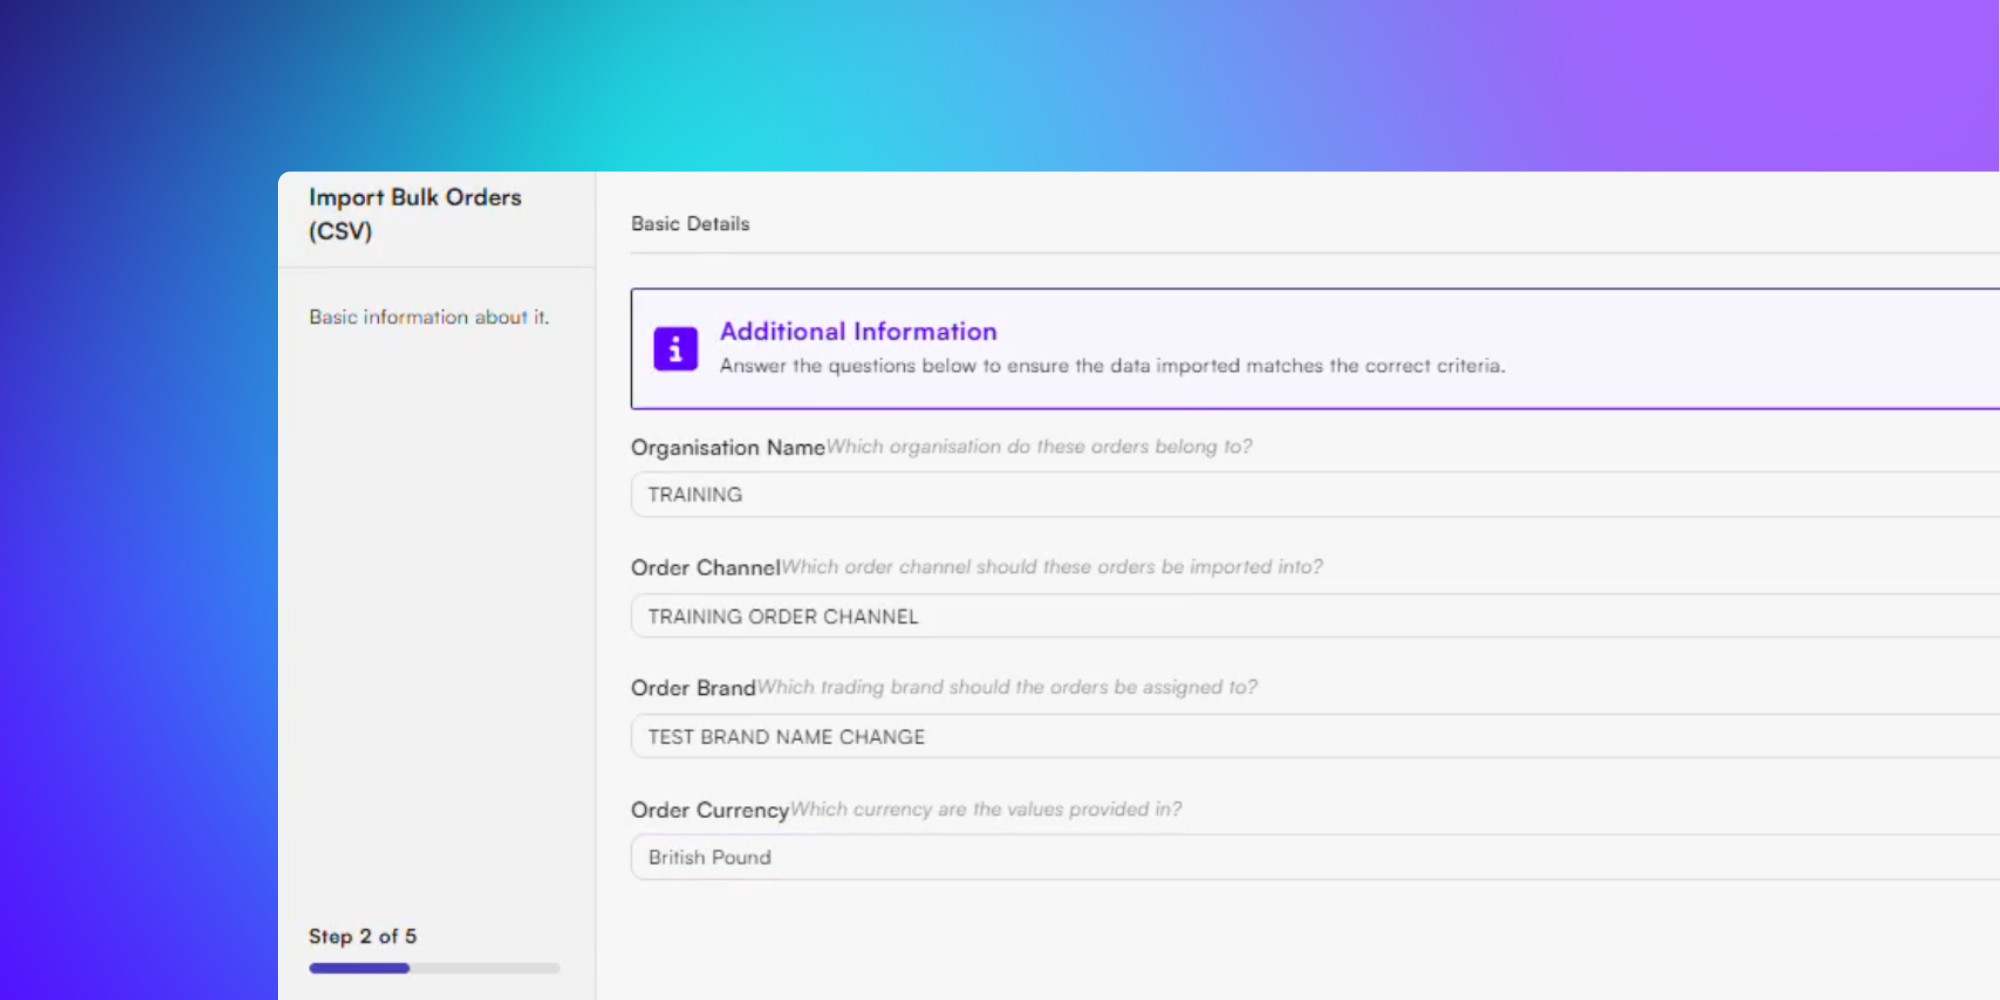
Next you’ll need to input some Basic Details, including:
Organisation Name
Order Channel
Order Brand
Order Currency
Once entered, click Next.
Data mapping your template
In the next step, you’ll be able to review the data mapped from your previous template and reconfigure the format if necessary to pull the correct information.
If you’re happy with the data, scroll to the bottom and select Next.
If you’ve configured your template in a way you’d like to use in the future, when the Save or Update Configuration as Template option appears, click Yes.
If you wouldn’t like to save the data mapping template, just click Skip.
Reviewing your data before import
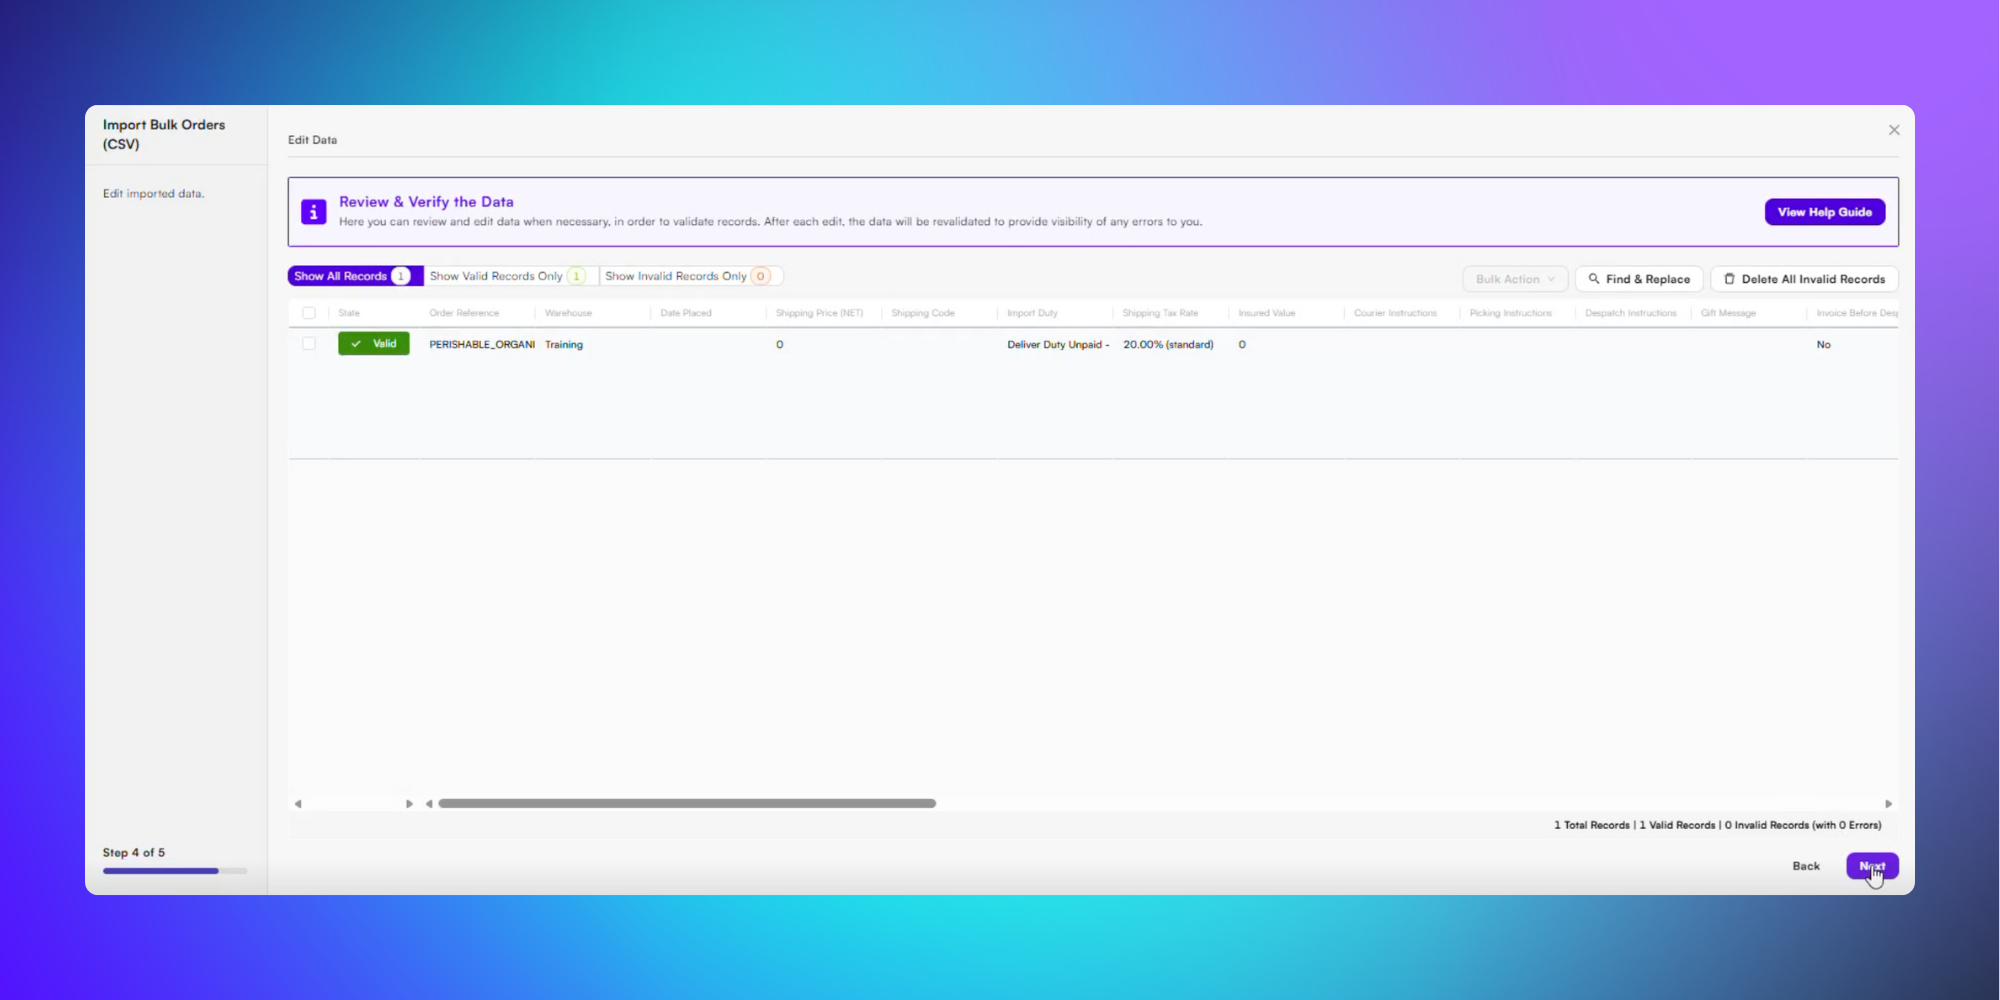
In the next step, you’ll review your order import data, showing valid records (successfully read) and invalid records (with errors) visibly listed.
This means you can go back and update errored records before you import.
Alternatively, you can Delete All Invalid Records before continuing.
If you’ve reviewed your data and are happy to go to import, click Next.
Finalising your import
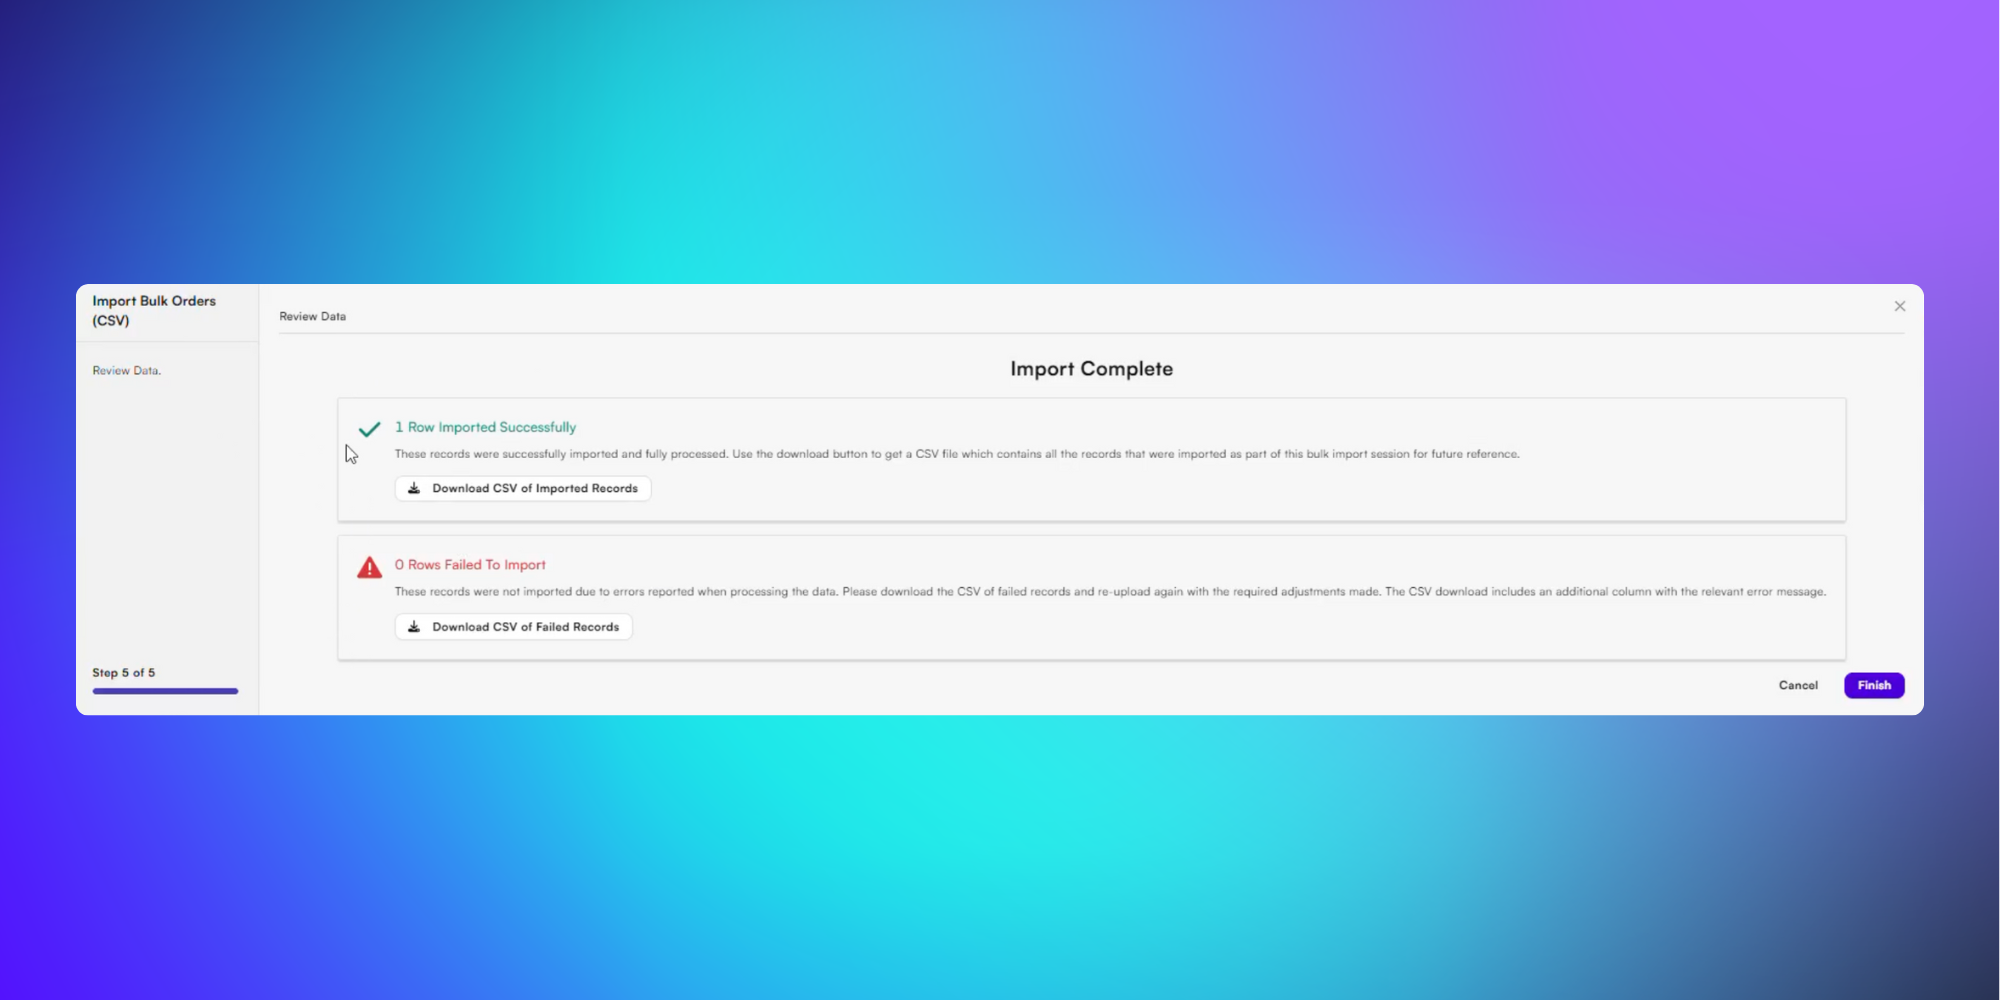
Once the import is complete, you’ll be shown an overview of the number of records successfully and unsuccessfully imported.
You’ll be able to download .CSV files of these for your records.
To finalise, click Finish.
Now you’ve imported your orders, they’ll be visible in the Order List page.
Was this helpful?
Still need help? Share an idea