Creating a purchase order
If you wish to move stock into one of our fulfillment centers ready to be sold, you will need to create a Purchase Order to confirm which products are due to be received and in what amount. This article shows you how to create a new purchase order in BladePRO.
Last updated About 1 month ago
Starting a new purchase order
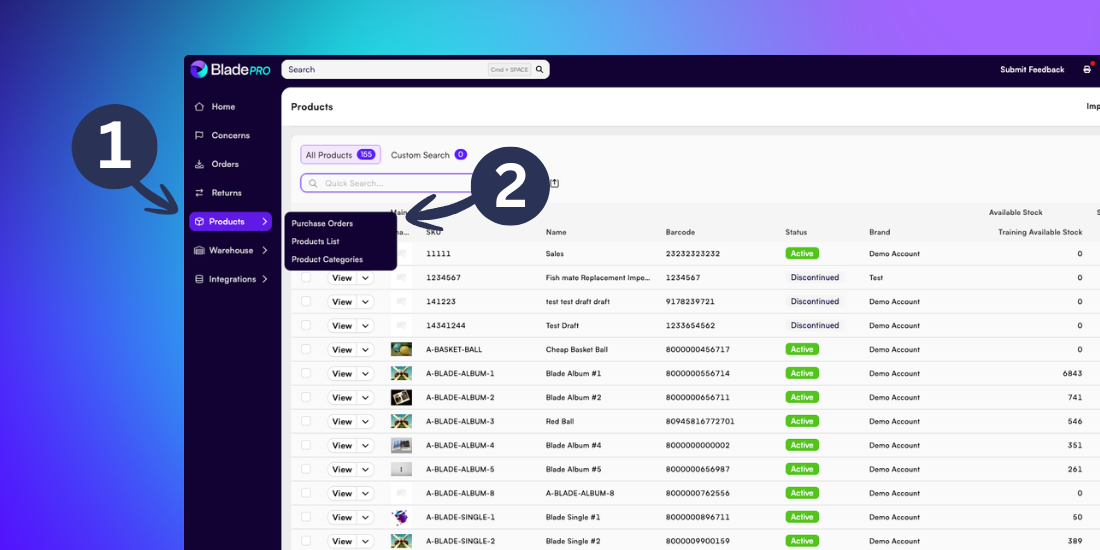
Click the Products icon in the left menu
Select Purchase Orders
This will take you to the Purchase Order (PO) List.
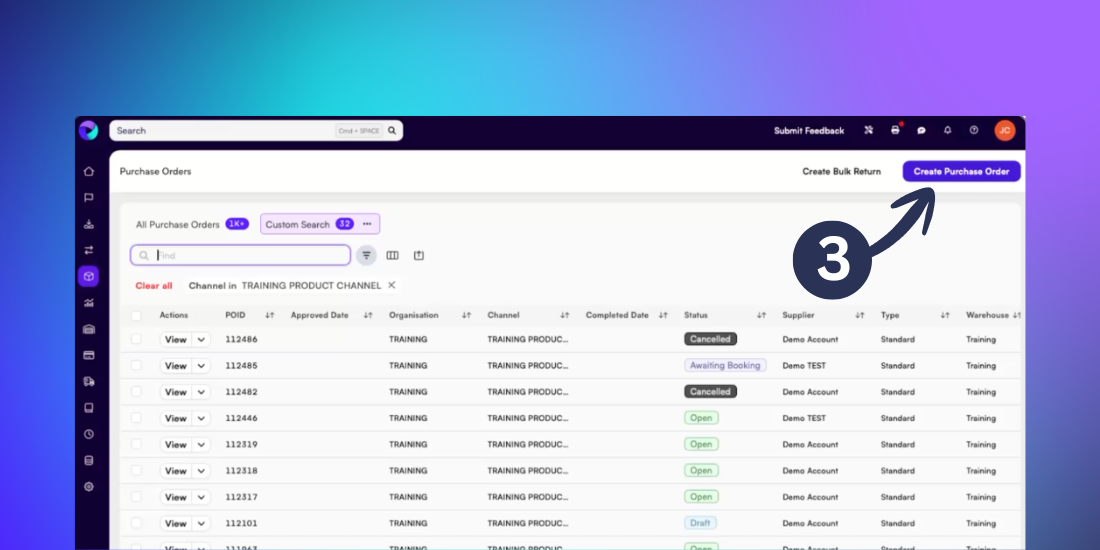
Click Create New Purchase Order at the top of the page
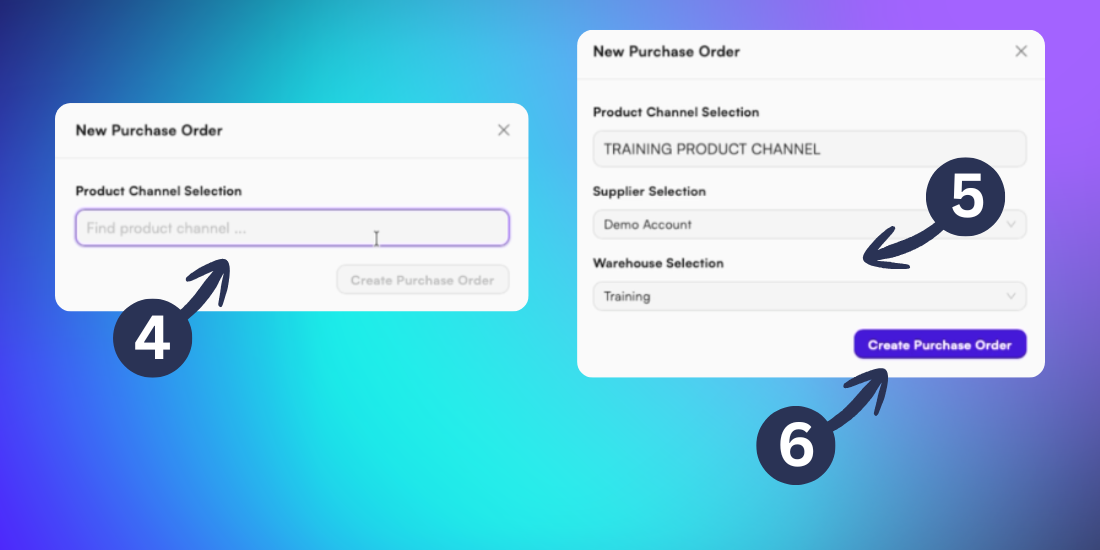
In the popup window insert the product channel for the purchase order. Once you start typing, the available options will display. Select the displayed product channel to continue
Then select the supplier and warehouse to use for the purchase order from the available options.
Once both options have been selected, click Create Purchase Order to proceed
Note: Only pre-set product channels on your profile and linked suppliers will be shown. If you cannot find the product channel or supplier that you require from the search menu, you will need to set up a new product channel or add a new supplier to the channel.
For further guidance contact your Account Manager.
Adding a reference and SKUs
Once your purchase order is created, it’ll remain in a draft status until the reference and products (SKUs) have been confirmed.
BladePRO will populate default values from the product channel and supplier but you are able to change the following information from the Main Details tab:
Warehouse - Choose which warehouse the PO is assigned to
Currency
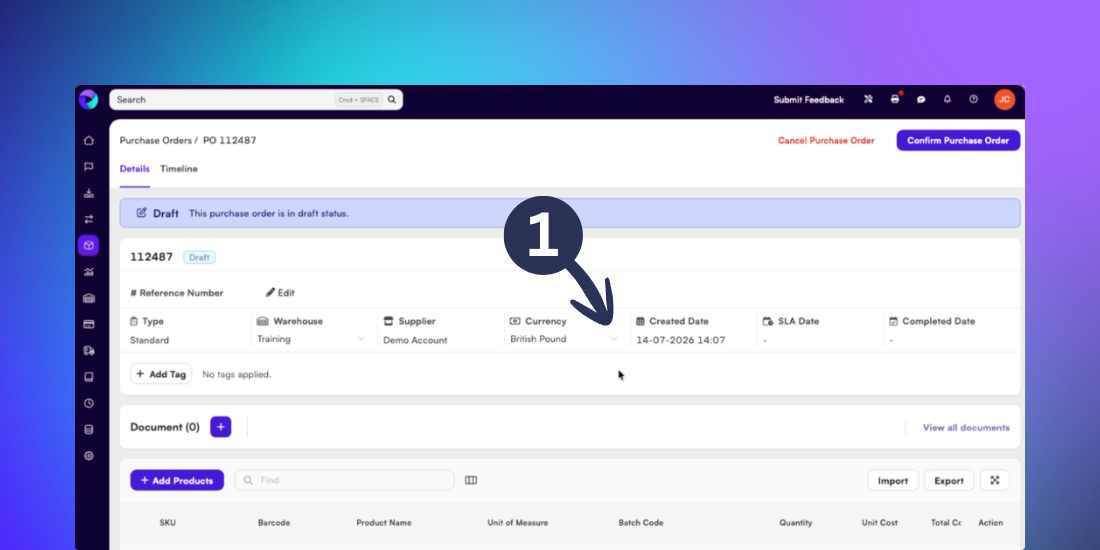
To update the warehouse or currency, click the dropdown icon next to the desired field to select from a different option
In order to create a purchase order you need to provide at least one unique reference.
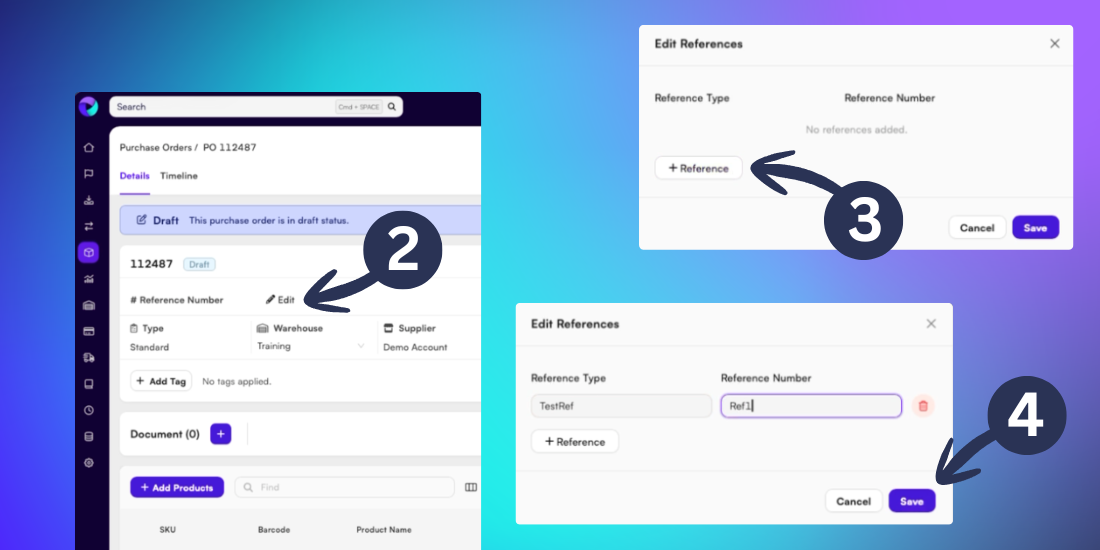
Click the Edit icon in the Reference Numbers section
Then click the +Reference button to add a new reference
Input your reference type in the first field and your unique numerical reference in the second field. The second field cannot match any other purchase orders in BladePRO. Then click Save
Next, scroll down to the Lines section of the purchase order page to start adding products.
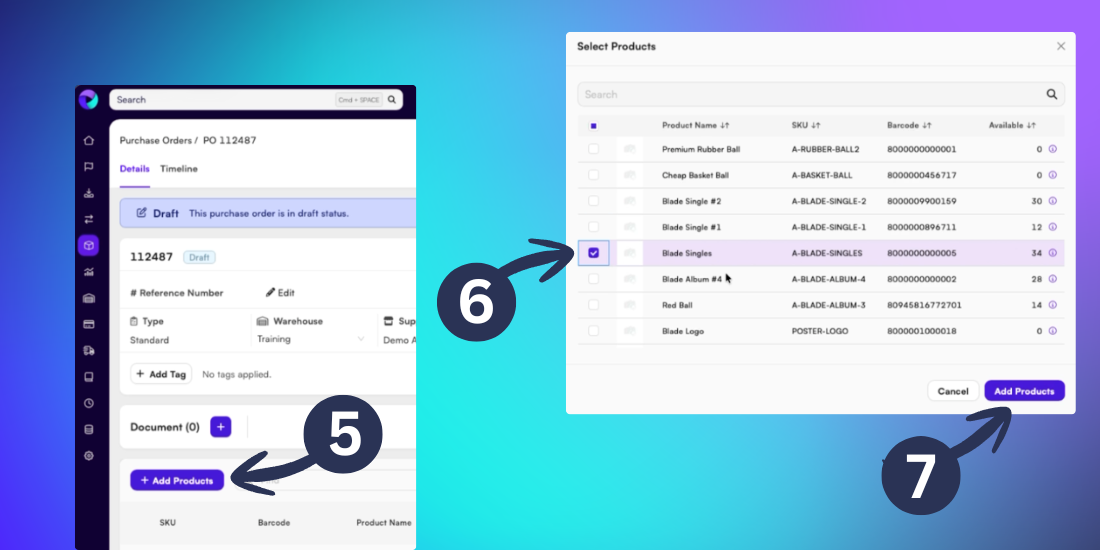
Click the +Add Products button to start selecting products to add to the Purchase Order
Start typing the name or ID of the SKU into the search bar, the select the SKU(s) you want to add from the search results.
Then click Add Products
This inserts the SKU as a line on your purchase order.
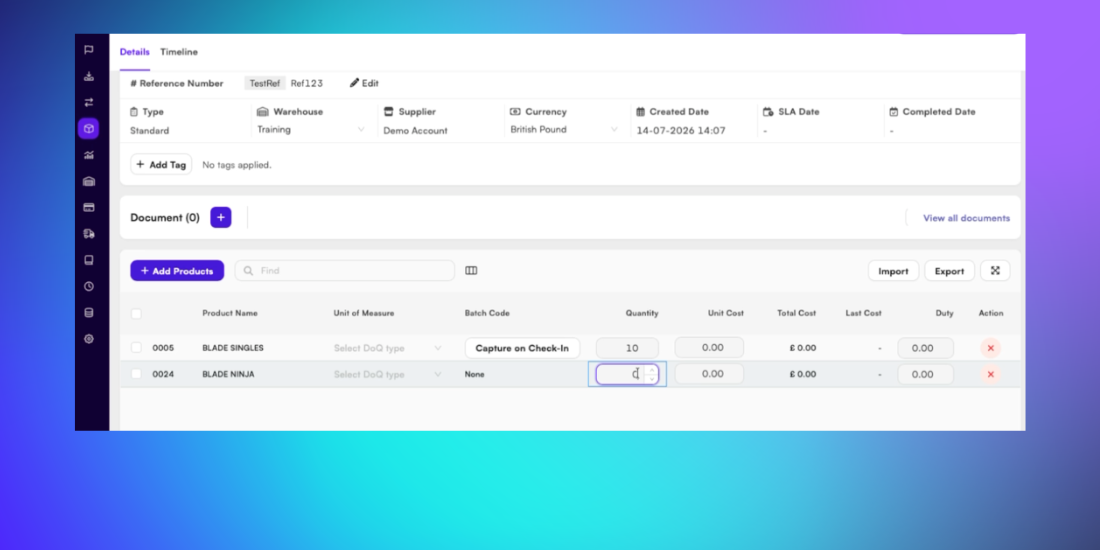
From the line you can:
Update the quantity of the SKU by clicking the quantity column
Change the pre-populated unit cost by clicking the unit cost column
Add any customs fees into the Duty column
Change the Unit of Measure by using the dropdown selector
Remove the SKU by clicking on the X on the right of the line
Specify any batch codes or choose whether this should be captured at Goods-In
Note: Denomination of Quantity (DOQ) refers to the size of the unit in the purchase order. For example: single item, inner box, outer box. To update the DOQ type, the dimensions for the SKU must already be set up in BladePRO.
For further guidance contact your Account Manager.
Finalising the purchase order
Once you’ve added the SKUs and checked all of the details are correct you can finalise the purchase order.
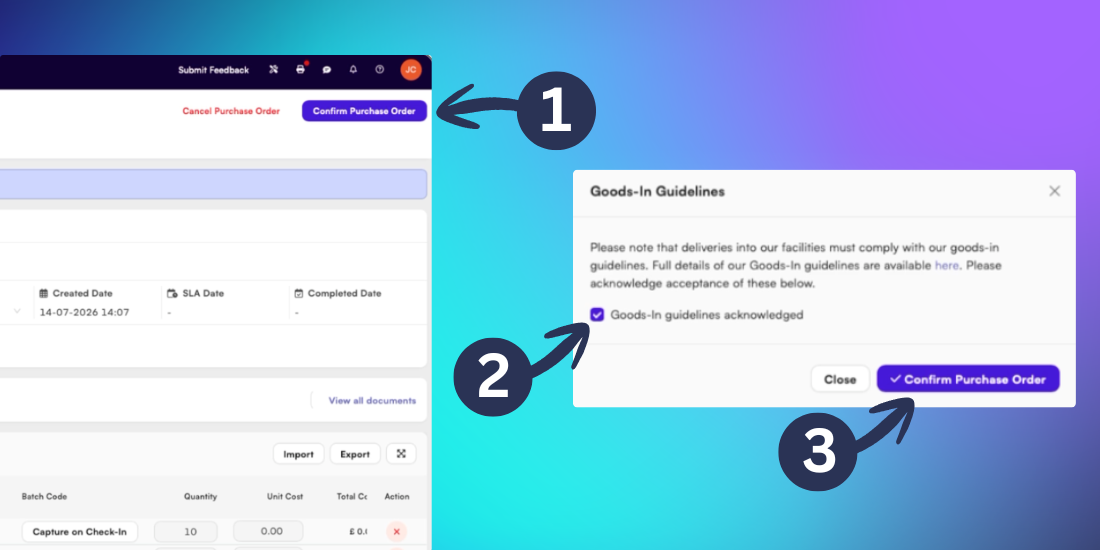
Click the Confirm Purchase Order button at the top right of the purchase order page
You will be asked to confirm that the delivery will comply with our Goods In Guidelines and click the button to acknowledge.
Then click the Confirm Purchase Order button.
Once you’ve created your purchase order, you will need to arrange a goods-in shipment.
Deliveries of 4 cartons or more require booking in. This ensures that our goods-in team have the resource to process your shipment on your preferred date and time.
Visit our support article on arranging a goods-in shipment here
Related articles
Still need help? Share an idea